Survival in Farthest Frontier is often not that easy, frost, hunger, diseases, wild animals and attacks sometimes cause frustration in the survival settler world, these Farthest Frontier tips and tricks for beginners and advanced might be helpful.
Farthest Frontier is a kickass city builder game from Crate Games that recently went into Early Access on Steam. Thus, it’s not yet fully developed and is getting a few updates per month currently, so it’s a bit of a work in progress. It is definitely one of the harder colony builder strategy games, and some of the settlers’ deaths may be avoidable if you know a few tips and tricks for Farthest Frontier.
That’s why here is my accumulated experience from currently more than 120 hours of gameplay in a small Farthest Frontier guide with 14 help, tips, and tricks to the game, so you don’t have to fail so often.
German Version:
Oh, and if you don’t know the game yet, but landed here because you want to learn more about one of the best survival building strategy and town builder games in 2022, check out my Farthest Frontier review, where I show all the details about the game and analyze the game. There you can find all the information about Farthest Frontier via text, video, or audio.
If some important things change due to updates and tips become invalid, or if I find out new things, I will most likely update this article a few times in the next weeks and months, so maybe check again from time to time. Probably later I will also make a video about these Farthest Frontier tips and tricks – but in advance here are the most important tips for settling in Farthest Frontier in text form:
- Survival in Farthest Frontier is often not that easy, frost, hunger, diseases, wild animals and attacks sometimes cause frustration in the survival settler world, these Farthest Frontier tips and tricks for beginners and advanced might be helpful.
- Heavy Tools
- Check the Workers Places
- The barn and its Settings
- Optimize Work Camps
- Optimize Defense – Watchtowers
- Settlement Defense – Double Gate Tactics
- Number of construction workers and decayed houses
- Gatherer, Herbs, Medicine
- Firewood is extremely important
- Constantly Recurring Tasks for the Mayor
- Trade – Earn Money in Farthest Frontier
- The Wolf Den – Meat Farm Option
- Hunting and Defending Against the Enemy Trick: A Hole in the Wall (with Maze)
- Free Building Repair with the Relocation Function (a Farthest Frontier Cheat )
- Do You Have More Questions About Farthest Frontier or Know More Tips and Tricks?
- Links and Sources:
Heavy Tools
There are quite a few buildings that need heavy tools, such as the windmill, or the smelters and forges. If there are no heavy tools in your realm, they cannot be built at all.
But even if you should have bought a few tools from the merchant, you must continue to make sure that more of them are available, because otherwise, these farms won’t produce anything. So if the tools have run out, then rather deactivate the building completely, until times again heavy tools are available, either by traders or by own production of heavy tools in the forge.
Check the Workers Places
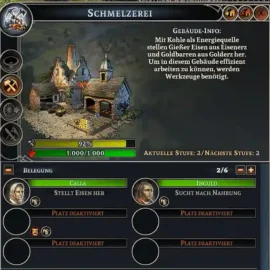
Very many buildings have some or even almost all worker positions disabled at the beginning. Therefore, you should definitely check every now and then if bottlenecks can be avoided, simply by unlocking these worker positions in existing buildings.
Maybe, as an example, you don’t need a new tailor building at all, but just need to take advantage of the seats that exist in the existing building but have been disabled.
The barn and its Settings
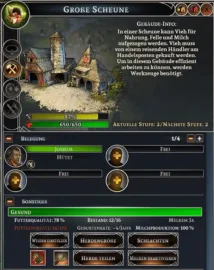
The barn or I prefer to call it the animal farm, is a more complex building that needs constant attention and fine-tuning, otherwise it won’t work at all, or at least not properly.
So you definitely need to check the barn/animal farm once a year for slaughter needs. Calves are born at the beginning of the year, therefore the end of the year is good to make room for new calves, this also saves feed in the winter. Too many calves cause diseases, plus it’s harder for farmers to keep them all adequately fed. While I always set the herd size to maximum, I then make sure that it is not reached or exceeded and then slaughter some of the animals accordingly.
For level 1 animal farm, I always go to 8 out of 10, and for level 2, 15 out of 20. Speaking of level 2 animal farm, when you expand the barn, the herd size is not automatically increased, so be sure to increase from 10 to 20 here.
Optimize Work Camps
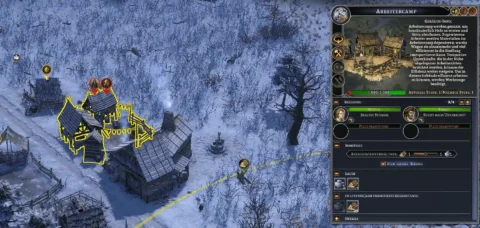
Another point that always needs your attention is the worker camps. Although these camps have a warning indicator when there are no more stones or no more trees in their work area, it has a long delay.
That’s why you should repeatedly check the worker camps, because very often the loggers already have no trees, even if the building does not yet have a warning sign. As an activity, the workers then say “idle” or “wandering around”. This is a clear sign that they are looking for raw materials, but cannot find any.
In the long run, I’m keeping the worker camps running with only 2 workers, and rather build more of them, further out of town. Because otherwise the trees don’t grow back fast enough, and that then leads to people just sitting around lazily. And we want to avoid something like that as much as possible, every worker costs food, wood, and construction material to maintain his buildings, so they should also bring in something for the settlement if possible.
Optimize Defense – Watchtowers
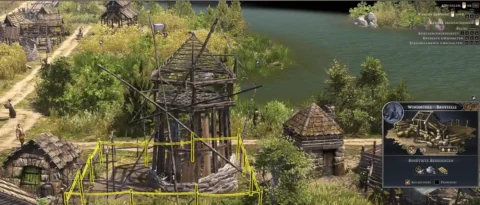
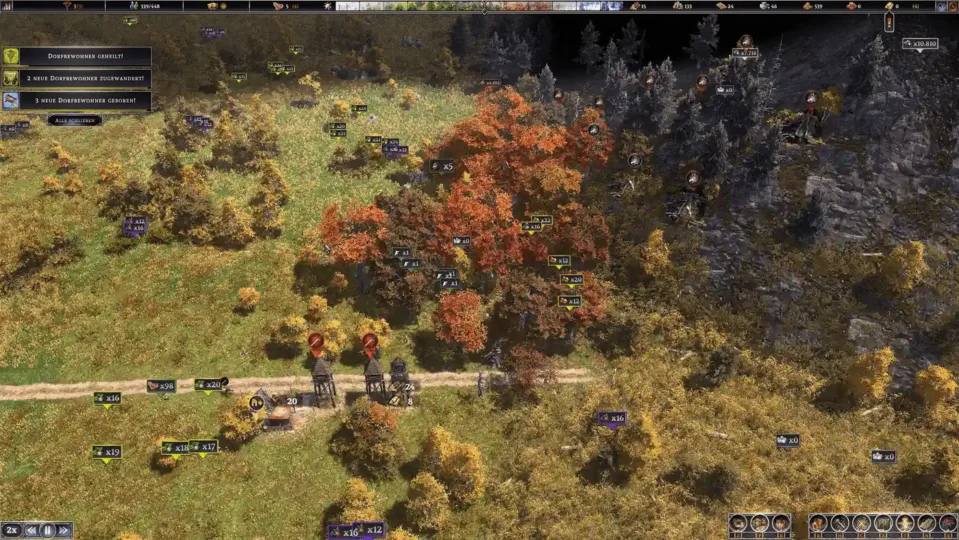
When playing with attacks, but also to defend against wolves and bears, watchtowers are enormously important. And their positioning has a very strong influence on how effective that defense ends up being. Immediately when I’m out of the absolute early stages, I start building watchtowers.
Because wolf attacks or raiders otherwise keep killing settlers, we want to increase their numbers as quickly as possible, not get them decimated over and over again. And towers offer the archers a defense in close combat, so they don’t get killed so easily in attacks. So far, so logical.
I erect than the watchtowers mostly directly in a double pack, later I put at important places even more in addition. So the towers can give each other better mutual cover. Because if attackers stand directly at the tower, the warriors change from ranged to melee (they stand probably at the tower door) and that lowers the combat power almost always. So if a second tower is standing so that it can shoot at the base of the first tower, they can protect each other and the likelihood of an attack destroying the tower drops plenty.
By the way, it is also true for the watchtowers that you should definitely pay attention to the workplaces because each watchtower comes with two possible places for guards, but at the beginning, only one slot of them is activated.
Settlement Defense – Double Gate Tactics
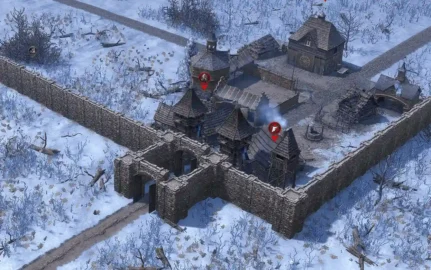
A little trick that works, by the way, in many games where there are walls and gates and where the gates often become a target for the enemies is the so-called “double gate” trick. Usually, you build a wall and in a place where you have a road leading out of the city anyway, you put a gate in the wall.
The attackers in Farthest Frontier have great tendencies to attack these gates. They also go for the walls sometimes, if they can get to it, they also attack residential houses or storage buildings first, which are not protected by walls. But most of the army targets the gates, if you have built a closed perimeter around the settlement, or at least the next gap is too far away.
If we now simply put a second gate in front of or behind the gate and then post two, three, or more towers there accordingly, the whole thing becomes much more stable and the attackers still go for the outer gate. The probability that the army can break through this double gate decreases enormously this way.
Number of construction workers and decayed houses
In the professions menu, you can manually change the number of construction workers in the upper right corner. You should also constantly expand this construction worker number as you build more houses. Not only because you will probably have more construction sites at some point, but also because all houses need to be repaired constantly so they don’t fall into disrepair. And if the number of construction workers is not enough to build the construction sites and at the same time keep the existing buildings in good shape, you will eventually have plenty of decaying houses. And these will then also bring down the attractiveness of the residential buildings in the area.
This then eventually leads to a “decaying” status, and decaying homes lower the attractiveness even more. If we don’t always pay attention here, our beautiful city can become a collection of vacant ramshackle hovels in a relatively short time. Run-down houses get a bar above the house (possibly turn it on and off with F2) and when that drops to zero, the building collapses completely and costs quite a bit more material and labor to rebuild.
While we can relatively easily turn these piles of rubble back into a construction site for a new building of the same type, repairing buildings is always cheaper than rebuilding them.
Gatherer, Herbs, Medicine
Gatherers can always contribute something to food diversity, especially in the beginning, but also in the outskirts. But there are actually much more effective sources for food, such as barns (animal farms), orchards, or fields. Nonetheless, you should definitely look carefully at the resources, which you overbuild from them.
You should also know that you can use the F4 key to toggle whether resources are not displayed at all, only with an icon, or with an icon and available quantity.
But besides all the mushrooms, berries, and other food, there are a few things out in nature that we absolutely need and whose presence we should therefore guard like the apple of our eye.
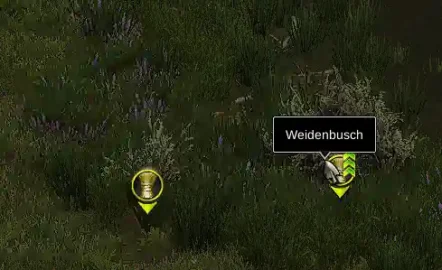
Wicker is extremely rare and enormously important for the baskets. Herbs are necessary for the processing of some food and medicinal herbs are also usually very few, and these are used by the healers. So if we should carelessly overbuild our only supplies for these with building sites, we will get an unnecessary shortage of these so important raw materials. Therefore, when placing construction sites in the open field, always make sure that you never flatten pastures, herbs, or medicinal herbs.
Firewood is extremely important
Firewood is what every settler needs in his house, otherwise the next winter will be deadly very, very quickly. And settlers often endure food shortages much better than a firewood shortage in winter. The distribution of firewood around the country is also important because it’s no use having a huge stockpile of it lying around somewhere, while at the other end of the empire people are freezing to death trying to carry firewood into their homes.
But in addition, which is not immediately obvious, charcoal burning also consumes firewood. So if you make coal with a charcoal burning facility and then wonder why your firewood is constantly in short supply, it might be advisable, if you have enough coal in stock, to cut back on the charcoal burning facility or shut it down altogether. After all, charcoal burning consumes precious firewood without taking into account that our people will freeze to death in winter. You can’t adjust quantities on that either, on or off, that’s all the control we have over it. And coal, unfortunately, is not used for heating homes, which would make sense. Well, maybe that will still come later with an update.
And because that’s not enough, the bakeries also consume firewood. Again, if the amount of firewood is running low, better shut down a few bakeries quickly. People are more likely to die from the cold than from not getting delicious bread and cakes.
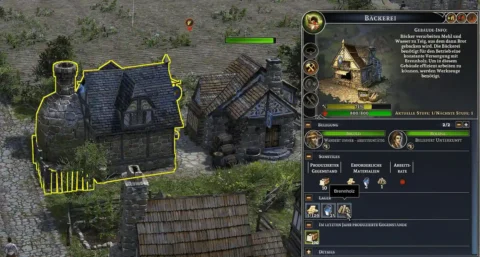
Bakery needs Firewood

Coal needs Firewood
Constantly Recurring Tasks for the Mayor
A special feature of Farthest Frontier, compared to most other build-up strategy games, is that here you don’t set something up and then it just works and you can run it more or less fully automatically. In FF there are numerous recurring actions that you absolutely should not forget:
In spring the traders come, you have to regularly plan which fields our garbage collector should spread compost on (which is done at the end of winter), the cattle have to be scheduled for slaughter, and we should regularly check fields for diseases or lack of fertility and adjust crop rotation if necessary, we have to check our worker camps, if maybe there is “wandering around” or “idle” standing with the workers, meaning they have not enough wood and stones, the orchards keep losing trees, and so we should check for gaps in the tree population and replant fruit trees. In addition, we need to adjust the construction worker quantity, move workers between production buildings, and constantly rebuild watchtowers, walls, and gates destroyed during attacks, repair them, etc.
If we don’t do these actions regularly, our settlement will most certainly not only run worse than it could but will probably run into bottlenecks and problems fairly quickly that could completely tip over the whole balance of the village.
Trade – Earn Money in Farthest Frontier
Here, of course, the trading center is the central point. If it is not clear to you how this works in general, please write to me in the ZapZockt Discord and I will explain it to you in more detail or write more about it here.
An extremely important point is not to miss the traders in the spring. Usually, the first ones come in the first month, and the last one may be in the fourth month maximum. And if you don’t pay attention to that, and you miss the tradesmen for a year or even several years, it can put really bad holes into your cash register. At least that’s true if the city itself doesn’t generate enough money, with markets, pubs, and taxes. And for me at least, that’s very often the case, so my cities are almost always dependent on steady trade, otherwise financially soon nothing will work at all.
A very logical tip for making money in Farthest Frontier is that if there are multiple merchants in the trading post, you should definitely check to see if one of them is selling things cheaply that the other might take back from you for more. This is quite rare, but when it happens, you can pick up some pretty good gold in the process, without much effort. Just buy the goods from merchant A (usually marked with a red arrow pointing down, so cheap) and sell them right back at the other merchant for a profit.
Since there are no taxes or fees, even with a price difference of only 1 gold per good, it already makes sense to do this. So always compare the lists well, if there are such lucrative opportunities.
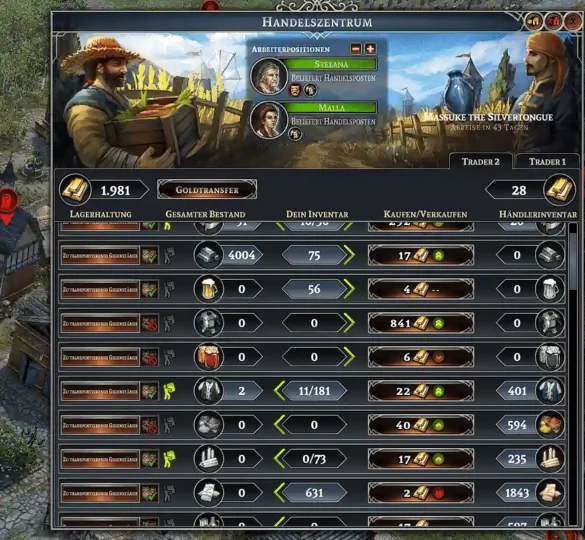
Earning Money in Farthest Frontier – The Tradepost
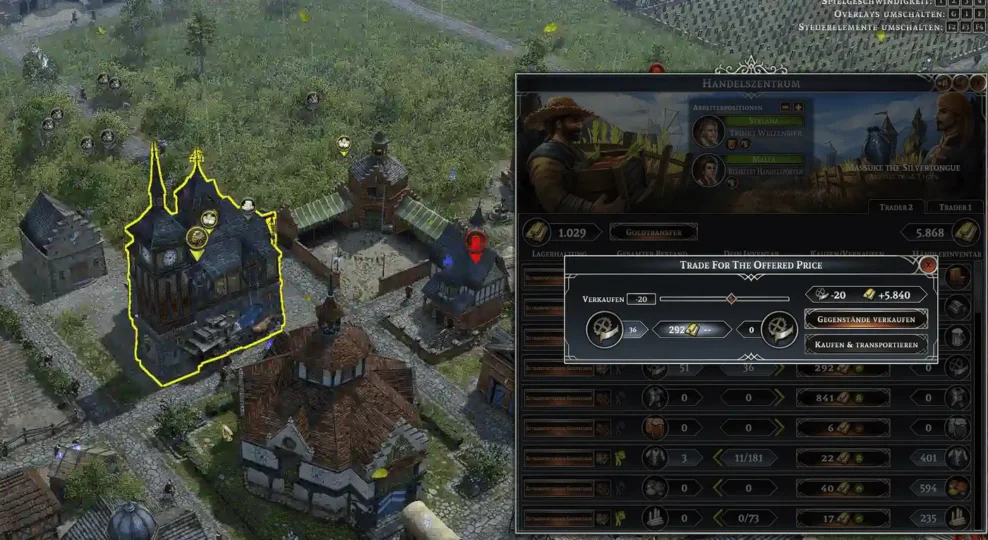
Get rich in Farthest Frontier with Buy and Sell
The Wolf Den – Meat Farm Option
Wolves often usually have a wolf den somewhere. These wolf dens, which are relatively dangerous, are also specifically announced as a danger. Often you get them eliminated only if you build a barracks and then specifically send at least 3-4 soldiers there, better more. And on some maps, it can happen, especially in resource-rich mountains, that the game places several of these wolf buildings right next to each other. This can be extremely dangerous for the settlers if they run into them, and often they lure a pack of wolves into the village, which then kills even more settlers. So overall, be careful with these caves, especially if there are several at once.
But we can also use such a clustered occurrence of wolf dens to our advantage by cleverly placing several guard towers at the edge of their aggro zone in such a way that they just can’t hit the wolf dens. If we then equip these towers with archers and place one or more hunters behind them, the result is a wolf slaughter-fest.
Because the watchtowers shoot automatically at the wolves if they run into the protection area of the tower. Then the wolves ” team up ” with each other, which means, if one is attacked, more wolves run up, which want to help him, and die then also. And because it’s so nice, wolves have a very fast respawn rate, which means the wolf den generates new wolves every few months.
And the result is that the guard towers shoot the wolves one by one, and then our hunters can farm the wolves’ carcasses for meat and leather in relative safety under the cover of the towers. If we set this up correctly, we may lose a few settlers in the process of installing this “wolf trap”, but once it’s in place, we’ll get regular free deliveries of meat and leather in large quantities. The number of towers, positioning, and laying of the area of effect of the hunters require a bit of trial and error and fine-tuning so that not too many builders and hunters get eaten by the wolves.
But, once you get past that, it runs wonderfully and for a long time. But beware, don’t expand the towers then if possible, because that will increase their range and then they might destroy one wolf den after another as a result, which could break our meat and leather farm that is running well.
Hunting and Defending Against the Enemy Trick: A Hole in the Wall (with Maze)
Now things get a little wilder. If we don’t play in pacifist mode, at some point we should surround our settlement with a wall, because the attacks of the raiders get progressively more severe. And every now and then even more dangerous mercenary troop come by, in heavy armor and with better weapons.
These always ask for some protection money first, even waiting graciously up to a whole year for our answer without attacking. So here we can easily leave the query window for a while and possibly fill unoccupied watchtowers, prioritize construction sites that can still contribute to the defense, etc. That should be pretty clear.
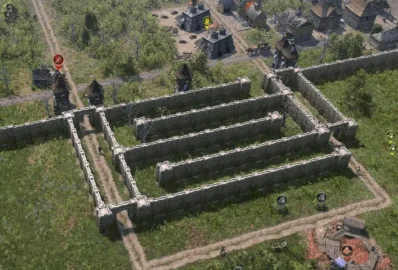
But I experimented around a bit, trying something I like to do in other games. Putting an open hole in the wall to attract enemies, and then building a maze of walls in front of it, so that this “entrance” looks easier than punching a hole in the gate or wall. But through the maze, a much wider path is required, zigzagging back and forth.
Then we add to that a few more guard towers than usual, and the soldiers who then stray into the maze have a quick and certain death ahead of them. This also works quite well in Farthest Frontier. Not all attackers run to the hole, but if the attack is near such a trap, there is always a good percentage that tries to make it through the maze. I then put two to three of these around the city walls, in different cardinal directions.
A nice side effect of this is that this gap in the wall is particularly popular with game to get in and out of the city. So if we then put a hunter next to the maze, he can shoot deer and wild boar there particularly easily. And also our cattle like to use the opportunity sometimes, when the food in the city is scarce, to graze outside in the meadow.
Free Building Repair with the Relocation Function (a Farthest Frontier Cheat )
The buildings all need maintenance, which requires construction worker time and also all sorts of construction materials. But there is also (currently with v.0.76) a cheat for repairing buildings:
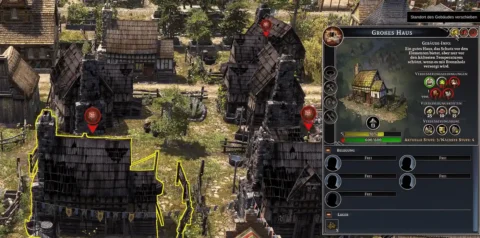
Every house (almost every) has a button in its interface in the top right corner, with which you can plan the building for moving. After that a few builders come, have to hammer around a bit to dismantle it and then again at the destination a bit to rebuild it. But this feature, at least for now, has a very nice side effect that we can use to our advantage.
So you can simply use the relocate function and place the building again in the same place. This requires the usual builder very little time for this, but it resets the durability without requiring any material. However, this only works for green or yellow “decay” progress bars. Once the house turns red, it’s too late, then the building’s interface will be locked, and thus the relocation function will be unavailable.
And another advantage is that these relocation tasks are probably a very high priority internally for the construction workers, so they get done quickly. Since this not only “repairs” the building, but on top of that doesn’t cost any material, it’s kind of cheating. But unfortunately, the repair function, at least currently at version 0.76 is also still a bit buggy, often the workers do not go off to do the repairing and so you can “help out” with it a bit.
Do You Have More Questions About Farthest Frontier or Know More Tips and Tricks?
Do you still have questions about Farthest Frontier and some of the game’s details and features are still not clear to you? Do you know more Farthest Frontier tips and tricks that are even better than these? Feel free to write me in the ZapZockt Community Discord, and I’ll be happy to discuss the game with you, and if it’s okay with you, I’ll add your tips and tricks here as well, attribution included of course.
Links and Sources:
The official Farthest Frontier Forum
Reading – recommendations:
A lot of detailed game news and information about games and gaming can always be found here at ZapZockt.de – As a Steam user, you can also follow the ZapZockt Steam curator to always be informed about my reviews directly on the platform.
Many of my game reviews might interest you, and if you don’t want to miss anything, subscribe to the newsletter. As a Google News reader, you can also go there and read the latest articles.

